If you’re managing your device using Microsoft Intune, you may want to control your Windows Defender Firewall policy. This can be useful to make sure that every device has the Windows Firewall enabled and that you’re controlling the inbound and outbound connections.
The Microsoft Intune interface makes this configuration pretty easy to do. The key is to create a configuration profile to target your Windows 10 devices. In this article, we’ll describe each step needed to manage the Windows Defender firewall using Intune.
Windows Defender Firewall Intune Requirements
The only requirement to manage your Windows Firewall with Intune is that your device runs Windows 10 and that it’s enrolled into Intune.
Create a Configuration Profile
To Begin, we will create a profile to make sure that the Windows Defender Firewall is enabled.
After, using the same profile, we will block certain applications and ports.
At the top of the Profile pane, select Create Profile
On the Create profile Pane
Enter a Name for your profile (1)
Add a Description (2)
Under Platform, select Windows 10 and later (3)
Under Profile Type, select Endpoint Protection (4)
Under Settings, click Configure (5)
The Endpoint Protection Pane opens
Select Microsoft Defender Firewall (6)
On the Microsoft Defender Firewall screen, at the bottom, we select the Domain network and in the opening pane, we select Enable under Microsoft Defender Firewall
Click Ok at the bottom to close the Domain network pane
This ensures that the device has the Firewall enabled
We will now create a firewall rule to block inbound port 60000 to communicate with our device.
Back in the Microsoft Defender Firewall pane, click the Add button at the bottom to add a Firewall rule
In the Create Rule pane, enter the desired information
Enter a rule Name
Enter a rule Description
In Direction, enter Inbound
Under Network Type, select Domain
In the Protocol box, enter TCP
In Ports, enter 60000
Click Ok at the bottom
Back in the Windows Defender pane, ensure that your Rule has been added
Repeat the steps if you need to add more firewall rules
You can remove it by clicking on the 3 dots at the right if needed
Click Ok twice and click Save to save your profile.
Now, it’s time to assign your profile to your devices. Without an assignment, your profile is not applied.
Click Assignments at the left (1)
Select Include and in the Assign to box, select the group you want to assign your Windows Firewall profile you just created (2-3)
Click Save at the top (4)
You’ll see a confirmation at the top right
On a managed device, you’ll see the following message: For your security, some settings are controlled by Group Policy
In the Inbound Rules section, you’ll see our rules that have been applied
Note: There is a rating embedded within this post, please visit this post to rate it.
You may already use many SSRS reports to monitor and visualize your SCCM data. Microsoft has released PowerBI a couple of years ago and has its advantage over SSRS
System Center Dudes team has decided to develop a series of Powerbi dashboard. We think that the visualization of your SCCM data should be done using PowerBi.
So… you’re ready to give this a try but are unsure where to start? We got you covered! This blog post will describe how to create your first SCCM Dashboard with Power BI Desktop.
SCCM PowerBi Dashboard Creation Requirements
The tools needed to develop a PowerBi dashboard is PowerBi desktop. We assume that you already have a fully functioning SCCM server.
We will start by installing PowerBI Desktop on a computer:
Wait for the process to finish and close the installation wizard
PowerBi Desktop
Once you launch PowerBi Desktop, at the top of the page is a ribbon of various tabs. The Home (1) tab provides various common functions. You can get new data (2), edit your current data (3), add new pages (4), visuals, or objects (5), create new measures and columns (6), or publish your report to Power BI on the internet. (7)
The View tab allows you to change from Desktop View to Phone View (1) or make other adjustments to the view settings. (2)
The Modeling tab allows you to manipulate the data you’ve imported to Power BI.
The Help tab offers links to a variety of Power BI help and training materials.
Below the ribbon, we can see three icons on the left side of the screen.
These icons is used to switch between the three options for viewing our data in Power BI Desktop. The default view is Report View, and the white space is called the Canvas. This is where we’ll build the visualizations that make up our Power BI reports.
At the bottom of the report are the page controls. Here, we can add new pages, delete existing ones, or rename pages by double-clicking on the title.
On the right, you have Filters and Visualizations options. We’ll come back to this later on this post.
Connect PowerBi to your SQL server
Now that you’re comfortable with the UI, we can link our SCCM SQL server which is the first step to start building your dashboard.
In the Home tab, click Get Data and select SQL Server
In the SQL Server database window, enter your Server and Database name and click Ok. Wait for the connection to complete.
The Navigator windows open. For our example, we’ll select the V_GS_Operating_System and V_R_System view. You can use the filter box at the top to find it. Once you selected, you’ll see a preview of the table
Click Load at the bottom
You’ll be bak in the Canvas
We will now, edit our query to remove unneeded data.
Still in the Home tab, we’ll select Edit Queries / Edit Queries
In this screen, you can “play” with the data. You can remove unwanted data. In our example, we will remove 2 complete columns. On the left, you can undo your action and see what steps have been applied.
Once completed, click Close and Apply at the top right
The data is loading in the PowerBi model
Create your SCCM Dashboard
The fun part of building your dashboard can now begin. We’ll create a pretty basic dashboard Dashboard. The goal is more to make you understand how easy it is to build.
On the right part, you’ll find the views you just imported. You can select the needed field and the data will appear on the Canvas. You can change between charts, tables, sliders, maps, gauge, and other visualization types.
In our example, let’s begin with a chart of the OS Build Numbers.
In the Visualizations pane, select Pie Chart
In the Fields pane, under V_GS_Operating_System, select BuildNumber0 and ResourceID
Back in the Visualization pane, drag down the ResourceID from Details to Values
The resulting Pie Chart appears on the Canvas
You can change the visual of the pie chart using the options in the Visualisation pane
Select your Pie Chart and select the paint roller brush
From there you have various options to change the visual of the Pie Chart
Now, let’s create a table to list the device identified by the pie chart.
Select Table from the Visualisation pane and in the V_R_System view, select Name0, Operating System, Build and Full Domain Name. All the information is populated in the table automatically
Now, click on an area on the pie chart, let’s select the only device with BuildNumber 17134 (purple)
The table changes automatically to display the selected device. This is where PowerBi is very cool, the data is dynamic and quick
From there, your imagination is the limit. Let’s say we want our device count displayed. Let’s try that using Q&A visualization type :
Select Q&A in the Visualisation pane
In the Ask a question about your data enter: count of v_r_system
Or final Dashboard looks like this :
It’s pretty basic for now but it has been created in less than 5 minutes. It’s pretty simple to add more data. From there your imagination is the limit. The tough part is to make it look good visually as too much data may be difficult to read. Please share your best PowerBi ideas!
Note: There is a rating embedded within this post, please visit this post to rate it.
With the increasing number of mobile users requesting access to external resources many organizations are configuring two-factor authentification to increase their security. There’s various software token solution on the market like RSA Secure Token, Google Authenticator or Microsoft Authenticator. This post will describe how to deploy Microsoft Authenticator app to your Intune devices. We’ll be describing how to deploy it on iOS and Android.
This app provides an extra layer of protection when you sign in, often referred to as two-step verification or multi-factor authentication. This new app replaces the Azure Authenticator, Microsoft account, and Multi-Factor Authentication apps.
If you are not using Intune yet, follow our step-by-step guide to start your modern management journey.
Microsoft Authenticator Intune App Requirements
Except than having Intune already setup and configured on your device, there’s no special requirement to deploy the Microsoft Authenticator app on your device.
However, there are requirements on the client-side :
iOS : Requires iOS 10.0 and watchOS 4.0 or later. Compatible with iPhone, iPad, and iPod touch.
Android : Varies depending device type
Create the Microsoft Authenticator App
We will now add the Microsoft Authenticator app to our Intune portal.
Select App (1), Add (2), iOS Store App (3) and Select (4) at the bottom
Click on Search the App Store, on the search box, enter Microsoft, select Microsoft Authenticator and click Select
Enter the App information and click Next at the bottom
In the Scope screen, click Next
On the Assignment tab, this is where you enter the group you want to deploy the app. Add your group to the desired deployment option.
On the Review + Create tab, review all your choices and click on Create at the bottom
You’ll see a confirmation at the top right
After creation, you’ll be sent to the Microsoft Authenticator app screen. Go to the Properties tab if you need to modify anything like Assignments. You can also see Deployment statistics on this screen
Android
We will now do the same step for the Android version of Microsoft Authenticator app.
Search for Microsoft Authenticator App and select it
Copy and paste the URL from your browser
Click Next at the bottom after all information has been entered
In the Scope screen, click Next
On the Assignment tab, this is where you enter the group you want to deploy the app. Add your group to the desired deployment option
On the Review + Create tab, review all your choices and click on Create at the bottom
You’ll see a confirmation at the top right
After creation, you’ll be sent to the Microsoft Authenticator app screen. Go to the Properties tab if you need to modify anything like Assignments. You can also see Deployment statistics on this screen
Review and test
Both Applications has now been added to our tenant and is ready to test on an iOS or Android device
On an iOS device, open the Company Portal and if you configured everything correctly, you’ll see the Microsoft Authenticator app
Note: There is a rating embedded within this post, please visit this post to rate it.
Microsoft has released a first SCCM version for 2020. SCCM 2002 has been released on April 1st 2020 ! (SCCM has a new branding since 1910 – now called Microsoft Endpoint Configuration Manager (MEMCM)). This post is a complete step-by-step SCCM 2002 upgrade guide, meaning that if you want to upgrade your existing SCCM/MEMCM installation to the latest SCCM/MEMCM updates, this post is for you.
You won’t be able to install SCCM 2002 if you are running SCCM 2012.
SCCM 1902 is the latest baseline version. This means that if you’re downloading the source from Volume Licensing, 1902 will be the starting version of your new SCCM site. Once a new server is built using 1902, you can upgrade to the latest version after.
To install SCCM 2002 as an update, you must have installed SCCM 1806 or later (SCCM 1810, SCCM 1902, SCCM 1906 or SCCM 1910). If you check for updates in your console and it’s not showing up, continue reading, we’ll describe how to get it using the “Fast Ring” script.
Keeping your infrastructure up to date is essential and recommended. You will benefit from the new features and fixes, which some of them can apply to your environment. It’s easier than ever to upgrade since Microsoft has implemented the servicing model directly from the console.
SCCM 2002 New Features and Fixes
SCCM 2002 includes an incredible amount of new features and enhancements in the site infrastructure, content management, client management, co-management, application management, operating system deployment, software updates, reporting, and configuration manager console. This release is packed with interesting features to try.
Here’s our list of favorite features. This release is packed with OS Deployment improvements. We’ll do blog posts on the most interesting feature in the coming weeks :
New management insight rules
Token-based authentication for cloud management gateway
Connection Health dashboard shows client connection issues
Improvements to CMPivot
Client log collection
Microsoft Edge management dashboard
Task sequence as an app model deployment type
Bootstrap a task sequence immediately after client registration
Improvements to task sequence progress
Improvements to OS deployment
Orchestration groups
Evaluate software updates after a servicing stack update
Improvements to BitLocker management
Integrate with Power BI Report Server
Support for SCCM Current Branch Versions
Ensure to apply this update before you fall into an unsupported SCCM version. Read about the support end date of the prior version of the following Technet article.
Windows and SQL Support
Before installing, make sure that you are running a supported Operating System and SQL version. Older SCCM version was giving a warning during the Prerequisite check but 2002 is giving an error that prevents the installation from continuing.
SCCM 2002 supports only Windows 2012+ and SQL 2012 SP3+.
Important Info
Version 1906 client requires SHA-2 code signing support.
Due to weaknesses in the SHA-1 algorithm and to align to industry standards, Microsoft now only signs Configuration Manager binaries using the more secure SHA-2 algorithm. The following Windows OS versions require an update for SHA-2 code signing support:
Windows 7 SP1
Windows Server 2008 R2 SP1
Windows Server 2008 SP2
Before you Begin
Downloading and installing this update is done entirely from the console. There’s no download link, the update will appear on your console once the Service Connection Point is synchronized.
If you’re running a multi-tier hierarchy, start at the top-level site in the hierarchy. After the CAS upgrade, you can begin the upgrade of each child site. Complete the upgrade of each site before you begin to upgrade the next site. Until all sites in your hierarchy are upgraded, your hierarchy operates in a mixed version mode.
Before applying this update, we strongly recommend that you go through the upgrade checklist provided on Technet. Most importantly, initiate a site backup before you upgrade.
In this post, we will update a stand-alone primary site server, consoles, and clients. Before installing, check if your site is ready for the update:
Open the SCCM console
Go to Administration \ Updates and Servicing
In the State column, ensure that the update Configuration Manager 2002 is Available
If it’s not available, right-click Updates and Servicing and select Check for Updates
Warning
The SCCM 2002 update is not yet available for everyone. If you need it right away you can run the Fast-Ring script and the update will show up.
If the update is not downloading, click on the button Download on the upper node. The update state will change to Downloading
You can follow the download in Dmpdownloader.log or by going to Monitoring / Updates and Servicing Status, right-click your Update Name and select Show Status
The process will first download .CAB file and will extract the file in the EasyPayload folder in your SCCM installation directory.
It can take up to 15 minutes to extract all files.
SCCM 2002 Upgrade Guide
Step 1 | SCCM 2002 Prerequisite Check
Before launching the update, we recommend launching the prerequisite check first. To see the prerequisite checklist, see the Microsoft Documentation
Open the SCCM console
Go to Administration \ Updates and Servicing
Right-click the Configuration Manager 2002 update and select Run prerequisite check
Nothing will happen, the prerequisite check runs in the background and all menu are unavailable during the check
One way to see progress is by viewing C:\ConfigMgrPrereq.log
You can also monitor prerequisite check by going to Monitoring / Update and Servicing Status, right-click your Update Name and select Show Status
If you have any warnings, follow the recommendation to fix the issue in the bottom pane
When completed the State column will show Prerequisite check passed.
Right-click the Configuration Manager 2002 update and select Install Update Pack
Step 2 | Launching the SCCM 2002 Update
We are now ready to launch the SCCM 2002 update. At this point, plan about 45 minutes to install the update.
On the General tab, click Next
On the Features tab, checkboxes on the features you want to enable during the update
Don’t worry, if you don’t select one of the features now and want to enable it later, you’ll be able to so by using the console Administration \ Updates and Servicing \ Features
In the Client Update Options, select the desired option for your client update
On the License Terms tab, accept the license terms and click Next
On the Summary tab, review your choices, click Next and close the wizard on the Completion tab
The whole process took a minute but the installation begins on the back end.
During installation, the State column changes to Installing
We suggest you monitor the progress, by navigating to Monitoring / Updates and Servicing Status, right-click your Update Name and select Show Status
Unfortunately, the status is not updated in real-time. Use the Refresh button to update the view.
Open the SCCM update log SCCMInstallationDirectory\Logs\CMUpdate.log with CMTrace
Important Info
We’ve done numerous SCCM upgrades. Some installation start a couple of minutes after you complete the wizard but we’ve seen some installation starts after a 10 minutes delay. Do not reboot or restart any services during this period or your update can be stuck in “Prerequisite check passed” status. There’s actually no officially documented methods by Microsoft to fix that. Patience is the key!
When completed, you’ll notice the message There are no pending update package to be processed in the log file
Monitoring / Updates and Servicing Status, right-click your Update Name and select Show Status, the last step will be Installation Succeeded
Refresh the Updates and Servicing node in Administration, the State column will be Installed
Updating the Outdated Consoles
As a previous update, the console has an auto-update feature. At the console opening, if you are not running the latest version, you will receive a warning and the update will start automatically.
Since all updates operations were initiated from the console, we didn’t close it during the process. We received a warning message when clicking certain objects. You will have the same message when opening a new console
Click OK, console restart and update will start automatically
Wait for the process to complete. You can follow the progress in C:\ConfigMgrAdminUISetup.log and C:\ConfigMgrAdminUISetupVerbose.log. Once completed, the console will open and you’ll be running the latest version
Verification
Consoles
After setup is completed, verify the build number of the console. If the console upgrade was successful, the build number will be 8968and the version is now Version 2002. Notice the new Endpoint Configuration Manager branding!
SCCM Servers
Go to Administration \ Site Configuration \ Sites
Right-click your site and select Properties
Verify the Version and Build number
SCCM 2002 Clients
The client version will be updated to 5.00.8968.100x (after updating, see the section below)
SCCM 2002 Client Package distribution
You’ll see that the 2 client packages are updated:
Navigate to Software Library \ Application Management \ Packages
Check if the update is successful, otherwise, select both packages and initiate a Distribute Content to your distribution points
Go to Software Library / Operating Systems / Boot Images
Select your boot image and check the last Content Status date. It should match your setup date
Updating the Clients
Our preferred way to update our clients is by using the Client Upgrade feature: (You can refer to our complete post documenting this feature)
Open the SCCM Console
Go to Administration / Site Configuration / Sites
Click the Hierarchy Settings in the top ribbon
Select Client Upgrade tab
The Upgrade client automatically when the new client update is available to the checkbox is enabled
Review your time frame and adjust it to your needs
Monitor SCCM Client Version Number
SCCM Reports Client Version
You can see our SCCM Client version reports to give detailed information about every client version in your environment. It’s the easiest way to track your client updates.
Collections
In conclusion, you can create a collection that targets clients without the latest client version because is very useful when it comes to monitoring a non-compliant client.
Here’s the query to achieve this: (You can also refer to our Set of Operational Collection Powershell Script which contains this collection)
select SMS_R_SYSTEM.ResourceID,SMS_R_SYSTEM.ResourceType,SMS_R_SYSTEM.Name,SMS_R_SYSTEM.SMSUniqueIdentifier,SMS_R_SYSTEM.ResourceDomainORWorkgroup,SMS_R_SYSTEM.Client from SMS_R_System where SMS_R_System.ClientVersion != '5.00.8968.1006'
Beginning with SCCM/MEMCM 2002, it’s possible to Integrate Power BI Report Server to an existing Reporting Point or to a site that doesn’t have a reporting point installed. Doing so will give you the ability to manage your Power Bi Dashboard the same way you manage your SSRS report. All done directly from the console makes it easier to deploy and edit your existing dashboard and to create a new one.
This post will describe the complete SCCM PowerBi Report Server Integration process. More specifically, how to Integrate SCCM/MEMCM Reporting point with Power BI Report Server on an SCCM 2002 site.
In our example, we’ll do it on a site that a reporting point is already installed but we’ll also explain the process for a site that doesn’t have a reporting point installed.
SCCM PowerBi Report Server Integration Prerequisites
Before you begin, you need to know that using a Power Bi Report Server is not free. You’ll need to have a Power BI Report Server license.
From here you have 2 possible paths: If you have a reporting point, follow the first steps, if you don’t have a reporting point, skip the first part and jump to the next section.
Reporting Point Already installed and running
The first step is to back up the reporting service encryption key. This is really important as if you skip this, you’ll lose access to your existing reports.
On the SCCM Reporting Server
Open Reporting Server Configuration Manager
Connect to your Reporting Instance
Click Encryption Keys and then select Back Up
Specify where to save the key, a file name(.snk) and type a strong password
Select OK
Ensure that there’s no error at the bottom and that the file has been created in the specified location
We will now remove the reporting services point role from the SCCM site
Open the SCCM Console
Go to Administration / Site Configuration / Servers and Site System Roles
Select the server on which you have a reporting service point, select it and at the bottom, right-click Reporting Services Point and select Remove Role
At the warning, select Yes
We will now uninstall SQL Server Reporting Services using the Program and Feature on the server
Select your SQL Server version (ex:SQL Server 2016 (64-bit)) and select Uninstall at the top
At the SQL 2016 window, select Remove
Select your instance and click Next
Only select Reporting Service – Native. Be careful here not to select Database Engine as you could destroy your SCCM installation
At the bottom, click Remove
Power Bi Server Installation
We will now install Power BI Report Server
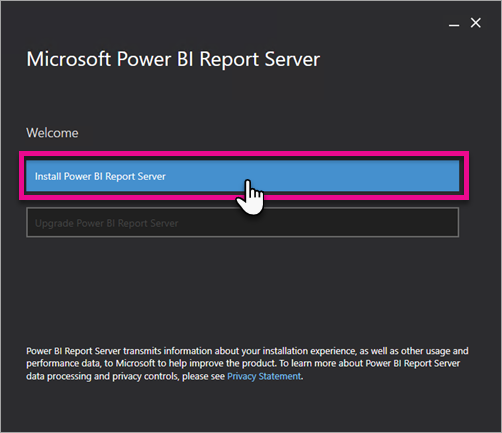
Click on the installation file downloaded in the Prerequisite Section
Select Install Power BI Report Server
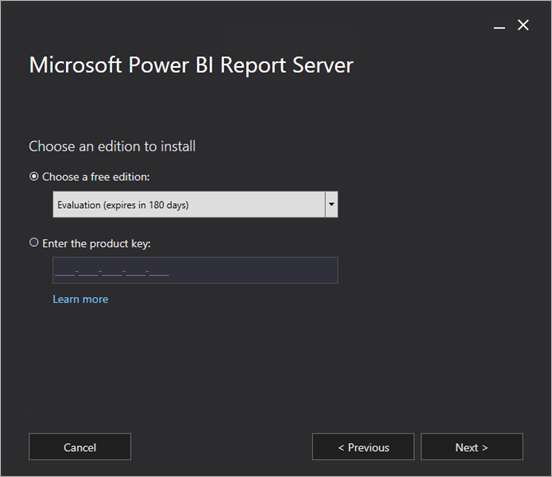
Choose an edition to install and then select Next
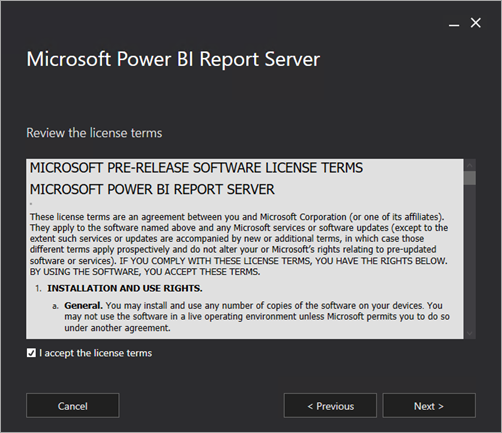
Read and agree to the license terms and conditions then select Next
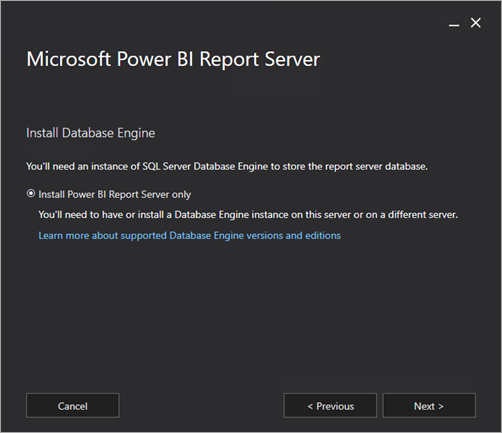
You need a Database Engine available to store the report server database. Select Next to install the report server only.
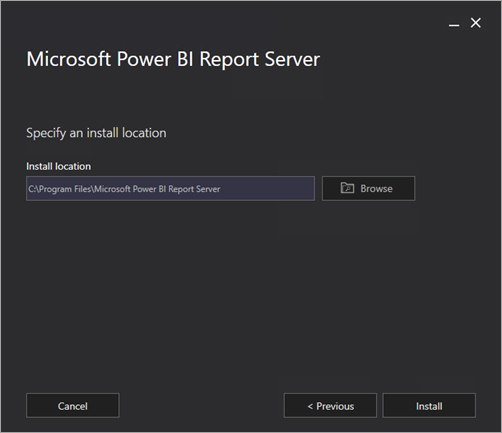
Specify the install location for the report server. Select Install
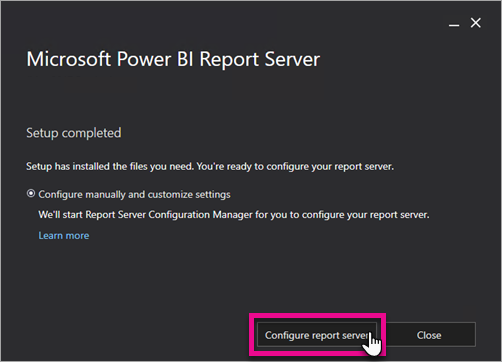
After a successful setup, select Configure Report Server to launch the Reporting Services Configuration Manager
When we uninstalled the SQL Reporting service in the steps before, the database was left intact. Now we just need to restore the backup keys.
Go to Database and select Change Database
Select Choose an existing report server database and select your Server database that you were already using
Select your server and credential
Ensure to select your ReportServer database
In Reporting Server Configuration Manager, select Encryption Key and then select Restore. Specify the file path that you saved in the prior steps and enter the backup password
Ensure at the bottom that everything is setup correctly
Return to the SCCM Console and add back the Reporting Services point role in Configuration Manager
We already documented the process of adding a Reporting Point in our SCCM Installation guide
No reporting points installed
Only use this process if you don’t already have a reporting services point on your SCCM site. Do all steps of this process on the same server:
With SCCM 2002 that was just released, a small but extremely useful feature is now available in console. It is now possible to view what boundary group a device is connected to!
This offers a new opportunity with collections based on Boundary groups, which could mean physical sites or any other meaningful needs in your environment.
I’ve created a PowerShell script that automatically creates collections based on all the available boundary groups.
Important Info
A few important notes on the information available here first :
If a device is in more than one boundary group, the value is a comma-separated list of boundary group names.
The data updates when the client makes a location request to the site, or at most every 24 hours.
If a client is roaming and not a member of a boundary group, the value is blank.
Information is only available on Primary sites. It is not visible on the CAS.
Requirements
SCCM must be at least version 2002. See our Step-by-step guide upgrade guide here
Be sure to rate the submission if you are using it.
Example of the result of the script
Tip
Add region, country, or else as a prefix in your boundary group names for easier sort.
Collection query for boundary groups
Thanks to fellow SystemCenterDudes, Eswar Koneti, for his post about that exact query This isn’t the typical query for collections
FIX UN BOX POUR LA QUERY
select SMS_R_SYSTEM.ResourceID,SMS_R_SYSTEM.ResourceType,SMS_R_SYSTEM.Name,SMS_R_SYSTEM.SMSUniqueIdentifier,SMS_R_SYSTEM.ResourceDomainORWorkgroup,SMS_R_SYSTEM.Client from SMS_R_System where SMS_R_System.ResourceId in (select resourceid from SMS_CollectionMemberClientBaselineStatus where SMS_CollectionMemberClientBaselineStatus.boundarygroups like ‘%”<BoundaryGroupName>“%’) and SMS_R_System.Name not in (‘Unknown’) and SMS_R_System.Client = ‘1’
Note that I use a like in the query. I’m doing so in the case of clients in multiple boundary groups. This will help in fixing potential errors in a boundary or boundary group.
Scripts details
A few parameters can be chosen in the script to fit your environment.
$CollectionPrefix let you decide what, if any, characters should be at the beginning of the collection
by default, it is set to BG –
$LimitingCollection
There is some default limiting collection options that are available, based on my previous script to create Master Collections
Simply uncomment the desired limiting collection
$Schedule
Refresh of the collection is set to once a day by default
A new folder is created at the root of all device collections, called Boundary Groups based collection
While the requirements of running SCCM/MEMCM in full SSL may be less required theses days with the Cloud Management Gateway being so effective with remote computers management, running the WSUS – Software Update point in SSL is likely to show up as a requirement whenever doing a security audit of your environment.
In this post, we will detail the required steps, from the certificate template creation to the client validation on enabling SSL for WSUS and the SCCM Software Update Point.
Using Internet-based client management would require such configuration to support Patch management while computer outside of the organization network.
This post focus only on configuring WSUS / Software Update point for SSL communication.
Requirements
Any SCCM version
Communication on port 8531 must be open on your Firewall
Warning
This post assume the the root CA is trusted by clients. This will be required since the certificate used should come from the same trusted source.
Certificate template Creation
The first step to enable SSL communication is to create a server certificate for your server.
On the server that is running the Certification Authority, open the Certification Authority console (certsrv.mmc), right-click Certificate Templates and select Manage
The Certificate Templates management console opens
Right-click the Web Server template and then select Duplicate Template
In the Duplicate Template dialog box, ensure that Windows 2003 Server, Enterprise Edition is selected in Certification Authority
In the General tab, enter a template name, like ConfigMgr Web Server
Change the validity period if needed. As a best-practice, the longer the validity period, the less secure is your certificate
In the Request Handling tab, select Allow private key to be exported
While not mandatory, this could become useful depending on the environment
In the Security tab, remove the Enroll permission from the Enterprise Admins security group
Choose Add, enter a group that has the WSUS/SUP server in. It can be an existing SCCM Server group. Then choose OK
Select the Enroll and Read permission for this group
Choose OK, close Certificate Templates Console
Back in the Certification Authority (certsrv.mmc) console, right-click Certificate Templates, select New / Certificate Template to Issue
Request certificate
The following must be done in the WSUS/SUP server. No need for standalone server, if role is installed on the primary server, it is fine.
Open the MMC console for a certificate of the computer
Under Personal/Certificates, right-click and select All tasks /Request new certificate
Click next
Select the web server certificate template created earlier
Under Alternative name, select DNS and enter the FQDN of the WSUS/SUP server, then click Add
Under General, it may be a good idea to add a Friendly name and description to ease management of certificates on the server
Hit ok and complete the wizard to create the certificate.
Configure WSUS administration website to use SSL
Open IIS, select the WSUS administration site and click on Bindings
Select HTTPS and click on Edit
From the select, chose the ConfigMgr WSUS SSL certificate enrolled earlier on the server
The IP address can be left to default All Unassigned
Expand the WSUS Administration site and select API Remoting30, then select SSL settings
Check the box Require SSL and hit Apply on the right side of the console
Repeat this step for the following components
ClientWebService
DssAuthWebService
ServerSyncWebService
SimpleAuthWebService
The last step, open a command prompt as admin, browse to the C:\Program Files\Update Services\Tools, and run the following command
WSUSUTIL configuressl <fqdn or the WSUS server>
Configure SCCM Software update point in SSL
Open the SCCM console, and browse to Administration/SiteConfigurations /Server and Site System roles, then select the Software Update point
Check the box Require SSL communication to the WSUS server
Once completed, it is a good idea to restart the Software Update point service to ensure communications are good under SSL.
To do so, browse to Monitoring/System Status/Component Status and start the Configuration Manager Service manager
Find SMS_WSUS_Configuration_Manager and restart it
Server validation
Forcing a Synchronize is a good idea to confirm hierarchy is still working correctly
On the Software Library node, select All Software Updates and click on Synchronize Software Update in the ribbon
Client Validation
On a client, run a Machine policy retrieval, followed by a Software Update scan cycle to validate client->server communication is working correctly.
Once the Update scan is initiated, progress can be seen in the WUAHandler.log on that client. We can notice the change in the URL pointing the HTTPS://<fqdn of the WSUS/SUP server>:8531
Downstream Software Update point
If you are having multiple WSUS/Software Update point, here are some important notes
When enabling SSL on WSUS, it should always be the parent WSUS/SUP that is configured first in SSL, before moving to downstream servers
Downstream servers require the exact same steps as mentioned above in order to be configured to use SSL.
Doing it only on the primary WSUS/SUP will not make clients communicate over SSL to downstream servers.
When the primary Software Update point is forced to use SSL, downstream WSUS will automatically check the box Use SSL when synchronizing update information to sync using port 8531 to the parent WSUS.
For more details on enabling SSL for WSUS, see Microsoft Docs.
The amount of data that transfers daily on a corporate network is quite important. Once a month, Windows Update has quite an impact on that amount. SCCM along Delivery Optimization can help better manage that crazy amount of GB or even TB of content required to patch all computers.
Using Delivery Optimization along ConfigMgr can be useful for the following reasons :
Avoid hosting GBs of updates on-prem across many different distribution points/host/data center to support all clients download. The content also becomes obsolete about 1 month after the download and distribution date.
Avoid using bandwidth between sites to sync GBs of updates
Leverage local Internet access from clients to download content locally
Self-clean up of obsolete content after a defined period.
Still use ConfigMgr to approve updates and does not change your patch cycle strategy
The Allow peer downloads in this boundary groupmust be checked for Delivery optimization to work.
If you have large boundary groups, enabling During peer downloads, only use peers within the same subnet may be a good fit.
For more details about peer download configuration for boundary groups, see Microsoft docs.
Client settings
There is 2 clients settings in order for Delivery Optimization to be configured.
Under Delivery Optimization, enable Use Configuration Manager boundary Groups for Delivery optimization for group ID
This option will define Delivery Optimization in Group Mode, which was pretty hard to achieve without boundary groups.
Under Software Update, enable Allow Clients to download delta content when available.
This does NOT require to enable Express Update on your Software Update Point.
Those client settings will create the following local policies on Windows 10 devices.
Delivery Optimization’s GPO
Why are GPO required on top of the ConfigMgr client configuration? Because some default values are a bit low to see a real benefit from using Delivery Optimization
The following GPO should be review and changed to recommended value.
Under Computer Configuration/Administrative Templates/Windows Component/Delivery Optimization, enable Max Cache Age
By default, it is set to 3 days, which is a bit fast to allow computers to share over your patching cycle
1814400 seconds is 30 days wish is reasonable to expire content prior to next cycle.
By default, it is set to 100mb. This isn’t critical for Windows Updates but could become really useful to allow computers to share content for smaller content, like Windows store apps that about for about 100MB per client per month.
Under Computer Configuration/Administrative Templates/Windows Component/Delivery Optimization, enable Delay Foreground download from HTTP
By default, it is set to 0 seconds, so it doesn’t allow computers to reach for content on Peers. Again not mandatory in terms of monthly patching from ConfigMgr, but useful for Microsoft store apps updates.
Under Computer Configuration/Administrative Templates/Windows Component/Delivery Optimization, enable Delay background download from HTTP By default, it is set to 0 seconds, so it doesn’t allow computers to reach for content on Peers. We decided to wait for 60 seconds prior to reach online for content. This is mostly for clients that are past due the schedule and haven’t downloaded to content ahead. It could generate large delay in user experience.
For more details about Delivery Optimization configuration, see Microsoft Docs
Software Update deployment
In order to make to most out of Delivery Optimization, clients must get updates from Microsoft Update, otherwise, other services like BranchCache will take over if downloaded from an internal source.
To allow clients to get updates from Windows Update, check the box If software updates are not available on Distribution point, download content from Microsoft Update. This is done on the deployment of the Software Update group.
That checkbox alone isn’t enough. If updates are available on a local Distribution Point, it will ignore any DO configuration and download locally. The Distribution point for the client must not host Windows update files.
This means remove the Software Update Package from the distribution point
Eventually, even the Automatic deployment rule can be modified to not even attempt to download updates if 100% of your clients gets content from Microsoft Update
Delivery optimization Results
The following month of patching will reflect the gain of using Delivery Optmization. To review it, browse to Monitoring/Distribution Status/Client Data source
Locally on clients, there’s a few Delivery optimization cmdlet to review usage.
Get-DeliveryOptimizationPerfSnapThisMonth
Get-DeliveryOptimizationPerfSnap
A side benefit of using Delivery Optimization
As explained earlier, leveraging Delivery Optimization for ConfigMgr content can also be useful for Apps updates from the Windows Store. Windows 10 computers download about 100mb worth of updates for all apps per month. Multiply this by the number of devices you have, and a TB of content will quickly arrive.
The below screen is taken from Update compliance that tracks this information, while ConfigMgr only reports content from Windows Updates.
Bottom notes
Be patient to see results
There’s also Microsoft Connected Cache, AKA Delivery Optimization In-Network Cache(DOINC), available if you wish to configure your distribution point as DO caches.
For more on ConfigMgr Delivery Optimization, see Microsoft docs.
We’ve been in the consulting world since SMS 2003 and we’ve seen so much stuff over the years! From the famous task sequence deployed to All system to the “fuck it let’s set our collections to be all incremental to make SCCM faster!”, we’ve seen it all… or have we? This blog post is an informative post on some of the SCCM Dos and Donts that you need to follow when using SCCM/MEMCM.
This post is intended to be informative, use it to refresh your skill or simply if you’re starting your SCCM journey and you’re looking to learn something new about.
SCCM/MEMCM – Donts
Ok, let’s start with the Don’ts. What you should avoid doing in the latest SCCM version?
Install a Central Administration Site
Don’t use a CAS. You’ll see this advice everywhere… and it’s true. Don’t use it. Just don’t.
When the Central Administration Site was introduced back in SCCM 2012 SP1 there was no concept of a preferred site system. If you had to manage thousands of clients in a remote site/region and a secondary site was not an option, the installation of numerous Primary Sites was needed (so was the CAS).
But now that new client management options were introduced in later SCCM version, this is not needed anymore.
A Central Administration Site may be needed in specific scenarios. If you need to manage more than 175 000 clients or need more than 250 distribution points and you’re still unsure or don’t know what you’re doing, please ask for external help!
Install a Seconday Site in remote locations
There was a day where putting a Secondary site to “big” remote site was the only solution available. Basically, you would install a secondary site if you had :
More than 500 clients in a remote location
Need a local Management Point
Need a local Software Update Point
With the latest SCCM version, clients can use boundaries to find site systems. Our recommendation would be to install Management Point, Distribution Points and Software Update Point remotely and use boundaries to communicates to these site systems.
Follow Microsoft recommendation for installing a secondary site but as for us, we didn’t install a secondary site for months. I’m not even sure it’s still required to this day to support the addition of secondary sites.
Install SQL on a separate server
In most scenarios, co-locate your SQL installation on your SCCM Primary Server. This is always debatable and often an unpopular topic among Database Administrators. DBA likes to have control and centralized databases as much as possible, however, co-location ensures better performance of your SCCM server.
From a licensing point of view, it’s not an issue since all of the System Center products include SQL Server technology
Incremental Collection everywhere
Collection refreshes are heavy processes on your server resource. It can bring your server running really slow if you configure collection incorrectly. The biggest mistake is enabling incremental refresh on all collections. We also often see incremental AND full collection updates enabled on the same collections.
SCCM Dos and Donts – Deploy to large collections without double verification
This one is fairly simple but so often forgotten. How many times we’ve seen an admin panicking because its deployment was spreading to All System. Unfortunately, there’s no Big red button to stop a wrong deployment out of the box. When deploying, always make sure to :
Double-check the collection and its members. Is the scoping right? Is the collection up-to-date?
Ensure that the correct setting for the reboot is set. You don’t want to reboot a workstation in the middle of the day after a sneaky deployment
Ensure that your available/required option and schedule are set correctly
When you check all of the above, check again and then, hit Apply
SCCM/MEMCM – DO
Enable Co-management
Enabling Co-management lets you to manage Windows 10 devices by using both SCCM and Microsoft Intune. It lets you cloud-attach your existing investment in Configuration Manager by adding new functionality. By using co-management, you have the flexibility to use the technology solution that works best for your organization.
So why enable CoManagement ? Why not is more the question. It’s so easy to enable, that you should at least try it to start your modern management strategy. (See next tip)
Get familiar with Intune
Microsoft is putting efforts to fill in the management possibility between SCCM and Intune. Will SCCM die? Not in the near future. But who knows what the future hold in a world where technology changes so fast.
If you use mobile devices (Phone, Tablet), Intune is a no brainer.
For Windows 10 devices, Intune is an additional management tool that you should at least start to use. It gives you new possibilities to manage your devices even if they are outside your organization network. (Device Profile, Conditional Access, Compliance Policies).
The cloud management gateway provides a simple way to manage SCCM clients on the internet. The CMG is a cloud service in Microsoft Azure, you can manage traditional clients that roam on the internet without an additional on-premises infrastructure. You don’t need to expose your on-premises infrastructure to the internet.
With the COVID outbreak, the CMG became a must to manage a roaming device during the time that everyone was working from home. Without a cloud management gateway or an Internet Based Client Management solution, you would simply won’t be able to manage them until they came back to the office.
Become a CMPivot Expert
SCCM has always been good with reporting and inventory of it’s managed devices but SCCM data is up-to-date at the last time the inventory has been run. SCCM CMPivot allows SCCM administrators to initiate a live query on selected computers on a specific topic. The result of that query can then be used to mitigate and fix potential issues.
How many time were you asked “what is the current state as of NOW?” well, you’ll finally be able to answer appropriately with SCCM CMPivot.
You may already use many SSRS reports to monitor and visualize your SCCM data. Microsoft has released PowerBI a couple of years ago and has its advantage over SSRS:
Support for Windows 7 ended on January 14, 2020. If you are still using Windows 7, your PC may become more vulnerable to security risks. Microsoft published the Windows 10 2004 feature update (aka Windows 10 May 2020 Update) on VLSC. If you haven’t planned your Windows 7 migration to Windows 10, this post will help prepare your SCCM Server to deploy it.
You may also need to deploy Windows 2004 to your Windows 10 computer to stay supported or to benefits from the new features. Before deploying a new Windows 10 feature upgrade, you need to have a good plan. Test it in a lab environment, deploy it to a limited group and test all your business applications before broad deployment. Do not treat a feature upgrade as normal monthly software updates. Treat it as a new operating system as if you were upgrading Windows 7 to Windows 10.
This blog post will cover all the task needed to deploy the new SCCM Windows 10 2004 Upgrade :
Check if you have an SCCM Supported version
Upgrade your Windows ADK
Import the OS in SCCM to use with your deployment Task Sequence
Create a Windows 10 Upgrade Task Sequence for Windows 10 (and Win 7 or 8.1 computers)
Update your Automatic Deployment Rules and Software Update, groups
Import your ADMX
Check Prerequisite SCCM Windows 10 2004 Upgrade
For Windows 10 2004 May 2020 Update, you need at least SCCM 2002 in order to support it as a client. See the following support matrix if you’re running an outdated SCCM version and make sure to update your site.
Windows ADK
Before capturing and deploying a Windows 10 2004 image, make sure that you’re running a supported version of the Windows ADK. Windows recommends using the Windows ADK that matches the version of Windows you’re deploying. If you’re already running an ADK version on your SCCM server, see our post on how to install a new version.
Upgrade Method – Task Sequence or Servicing Plan?
You can’t use servicing plans to upgrade Windows 7 or Windows 8 computers. So you must use an upgrade task sequence.
In order to upgrade an existing Windows 10 to Windows 2004, you have 2 choices: You can use an upgrade Task Sequence or you can use Servicing Plans.
There a strong debate over which is the best method. We prefer to use Upgrade Task Sequence for the simple reason that it’s more customizable. You can run pre-upgrade and post-upgrade tasks which will be mandatory if you have any sort of customization to your Windows 10 deployments.
For example, Windows 10 is resetting pretty much anything related to regional settings, keyboard, start menu and taskbar customization. Things are getting better from one version to another but if you’re upgrading from an older build, let’s say 1511, expect some post-configuration tasks… and the only way to do that is using a task sequence.
Servicing Plan has the simplicity, you set your option and forget, as for Automatic Deployment Rules does for Software Updates. We yet did not have any client that doesn’t want any control over Windows 10 upgrade in their organization. We totally understand the point of Servicing Plan and they’ll be useful in a couple of releases when Windows 10 upgrades will be an easy task… but for now, it’s not, unfortunately.
Import SCCM Windows 10 2004 Operating System
We will now import the Windows 10 2004 WIM file for Operating System Deployment. If you don’t have the Windows 10 ISO, you can download it from Microsoft Volume Licensing Site.
We will be importing the default Install.wim from the Windows 10 media for a “vanilla” Windows 10 deployment. You could also import a WIM file that you’ve created through a build and capture process. This WIM wile will be used for new computers, to upgrade an existing Windows 10, you need to import an Operating System Upgrade Packages. We will cover this in the next section.
Open the SCCM Console
Go to Software Library / Operating Systems / Operating System Images
Right-click Operating System Images and select AddOperating System Image
On the Data Source tab, browse to your WIM file. The path must be in UNC format
You can now select to import only a specific index from the WIM file. We selected the Windows 10 Enterprise index
Select your Architecture and Language at the bottom and click Next
In the General tab, enter the Name, Version and Comment, click Next
On the Summary tab, review your information and click Next
Complete the wizard and close this window
Distribute your SCCM Windows 10 2004 Operating System Image
We now need to send the Operating System Image (WIM file) to our distribution points.
Right-click your Operating System Image, select Distribute Content and complete the Distribute Content wizard
Add Operating System Upgrade Packages
We will now import the complete Windows 10 media in Operating System Upgrade Packages. This package will be used to upgrade an existing Windows 10 or a Windows 7 (or 8.1) device to Windows 10 using an Upgrade Task Sequence.
Open the SCCM Console
Go to Software Library / Operating Systems / Operating System Upgrade Packages
Right-click Operating System Upgrade Packages and select AddOperating System Upgrade Packages
In the Data Source tab, browse to the path of your full Windows 10 media. The path must point to an extracted source of an ISO file. You need to point at the top folder where Setup.exe reside
You can now select to import only a specific index from the WIM file. We selected the Windows 10 Enterprise index
Select your Architecture and Language at the bottom and click Next
In the General tab, enter the Name, Version, and Comment, click Next
On the Summary tab, review your information and click Next and complete the wizard
Distribute your Operating System Upgrade Packages
We now need to send the Operating System Upgrade Package to your distribution points.
Right-click your Operating System Upgrade Package, select Distribute Content and complete the Distribute Content wizard
Create SCCM Task Sequence for Windows 10 2004
Let’s create an SCCM task sequence upgrade for a computer running a Windows 10 device. Once again, this Task Sequence could be used for Windows 7 or 8.1.
Open the SCCM Console
Go to Software Library \ Operating Systems \ Task Sequences
Right-click Task Sequences and select Upgrade an operating system from upgrade package
In the Task Sequence Information tab, enter a Task Sequence Name and Description
On the Upgrade the Windows Operating System tab, select your upgrade package by using the Browse button
Select your Edition Index depending on the edition you want to deploy. If you select just 1 index as per our indication in previous steps, you’ll see just 1 index to select from.
On the Include Updates tab, select the desired Software Update task
All Software Updates will install the updates regardless of whether there is a deadline set on the deployment (on your OSD collection)
Mandatory Software Updates will only install updates from deployments that have a scheduled deadline (on your OSD collection)
Do not install any software updates will not install any software update during the Task Sequence
On the Install Applications tab, select any application you want to add to your upgrade process
On the Summary tab, review your choices and click Next and click Close
Edit the SCCM Windows 10 2004 Task Sequence Upgrade
Now that we have created the upgrade task sequence, let’s see what it looks like under the hood.
Open the SCCM Console
Go to Software Library \ Operating Systems \ Task Sequences
Right-click your upgrade task sequences and select Edit
As you can see, it’s fairly simple. SCCM will take care of everything in a couple of steps :
The Upgrade Operating System step contains the important step of applying Windows 10
Ensure to choose the right Edition
Deploy the SCCM Windows 10 2004 Upgrade Task Sequence
We are now ready to deploy our task sequence to the computer we want to upgrade. In our case, we are targeting a Windows 7 computer.
Go to Software Library \ Operating Systems \ Task Sequences
Right-click Task Sequences and select Deploy
On the General pane, select your collection. This is the collection that will receive the Windows 10 upgrade. For testing purposes, we recommend putting only 1 computer to start
On the Deployment Settings tab, select the Purpose of the deployment
Available will prompt the user to install at the desired time
Required will force the deployment at the deadline (see Scheduling)
You cannot change the Make available to the following drop-down since upgrade packages are available to clients only
On the Scheduling tab, enter the desired available date and time. On the screenshot, we can’t create an Assignment schedule because we select Available in the previous screen
In the User Experience pane, select the desired options
In the Alerts tab, check Create a deployment alert when the threshold is higher than the following check-box if you want to create an alert on the failures
On the Distribution Point pane, select the desired Deployment options. We will leave the default options
Review the selected options and complete the wizard
Launch the Upgrade Process on a Windows 10 computer
Everything is now ready to deploy to our Windows 10 computers. For our example, we will be upgrading a Windows 10 1909 to Windows 10 2004. This task sequence can also be used on a Windows 7 or 8.1 devices to install Windows 10 2004.
Log on our Windows 10 computer and launch a Machine Policy Retrieval & Evaluation Cycle from Control Panel / Configuration Manager Icon
You’ll see the SCCM upgrade task sequence as available. We could have selected the Required option in our deployment schedule, to launch automatically without user interaction at a specific time
When ready, click on Install
On the Warning, click Install
The update is starting, the task sequence Installation Progress screen shows the different steps
The WIM is downloading on the computer and saved in C:\_SMSTaskSequence
You can follow task sequence progress in C:\Windows\CCM\Logs\SMSTSLog\SMSTS.log
After downloading, the system will reboot
The computer restart and is loading the files in preparation for the Windows 10 upgrade
WinPE is loading
The upgrade process starts. This step should take between 60-90 minutes depending on the device hardware
Windows 10 is getting ready, 2-3 more minutes and the upgrade will be completed
Once completed the SetupComplete.cmd script runs. This step is important to set the task sequence service to the correct state
Windows is now ready, all software and settings are preserved
Create Software Update Group
One important thing in any OSD project is to make sure that the deployment of every machine is up to date. Before deploying Windows 10 2004, make sure that your Software Update Point is configured to include Windows 10 patches.
Once Windows 10 is added to your Software Update Point, we will create a Software Update Group that will be deployed to our Windows 10 deployment collection. This way, all patches released after the Windows 10 media creation (or your Capture date) will be deployed during the deployment process.
To create a Windows 10 Software Update Group :
Open the SCCM Console
Go to Software Library / Software Updates / All Software Updates
On the right side, click Add Criteria, select Product, Expired and Superseded
Product : Windows 10
Expired : No
Superseded: No
Title contains 2004
Select only the latest Cumulative Updates that apply (x64 or x86) and select Create Software Update Group
Once created, go to Software Library / Software Updates / Software Update Groups
Right-click your Windows 10 SUG and deploy it to your OSD deployment collection
Import ADMX File
If you’re responsible for managing group policy in your organization. Ensure that you import the latest Windows 10 2004 ADMX file on your domain controller.
Bonus Ressources
After your SCCM Windows 10 2004 Upgrade, need a report to track your Windows 10 devices? We developed a report to help you achieve that :
This blog post will show you how to Block TikTok Microsoft Intune on iOS and Android. This strategy can be used for any app.
TikTok was recently caught accessing user clipboard data when running in the background, potentially exposing passwords or other sensitive data. The behaviour was revealed because of a new feature in iOS 14, and it’s unclear how long it had been present in the app. TikTok has since removed the feature, but the privacy scare underscored long-standing privacy concerns over the app, which is owned by China-based ByteDance.
The NY Times also reported that TikTok has been under scrutiny as a potential national security threat. Amazon has also asked its employee to remove TikTok from their corporate phone to keep email access.
So, with all this information, it’s possible that your company asks you to block TikTok from your corporate devices. This post will show you how to bloc TikTok using Microsoft Intune device compliance policy and Conditional Access.
Can we block the TikTok app in an enterprise environment? You can’t block users from installing it and using it, but you can block their company access if they are.
If you’re starting with Intune, you may be tempted to use a device configuration profile and use an Application Restriction policy. This look like exactly done for that… but after trying it ourselves for hours, we never got it to work. The documentation is poorly made and the troubleshooting tools and reports are just bad. Impossible to know what’s wrong with our policy.
So we didn’t stop there and we decide to go with a good old Device Compliance policy. In short, the policy checks for our app (TikTok) and mark the device as “Non-Compliant”. After, we’ll set up a Conditional Access policy to block all devices that is not compliant to company resources.
Block TikTok Microsoft Intune – Device compliance policy and Conditional Access
iOS
We will start by show how to block Tiktok on iOS.
Bundle IDs for native iOS and iPadOS apps are all well documented but third party app is more tricky to find. The easiest way is to use the method documented in this blog post. In our case, we found the Tik Tok App BundleID: com.zhiliaoapp.musically
At the end of this post, we gather some popular BundleID for you to use if you want to block more app than just Tiktok.
Now that we have the BundleID, we’ll create our Device Compliance Policy.
Click on Device compliance / Policies and Create Policy
Platform: iOS/iPadOS
Click Create at the bottom
In the Basic tab, enter a Name and Description, click Next
On the iOs Compliance Policy tab, select System Security
In Restricted Apps , enter a friendly name and the App BundleID
Name : TikTok
Bundle ID : com.zhiliaoapp.musically
Click Next
In the Action for Compliance tab
Keep the Mark device noncompliant at 0
I like to add a Send Email to end User option to notify the user. Once selected, you need to select the message template. If you haven’t created a template yet, skip this step, you could come back and add it later.
Click Next
In the Scope tab, select a scope. We leave it to the Default scope, click Next
iOS Compliance Policy must be assigned to groups of users.
On the Assignment tabs, Select the group you want to deploy your restriction to. We select our Test groups, click Next
On the Review + Create tab, select Create at the bottom
Android
The Android version is pretty similar to a single change at the start. Follow all iOS steps except when creating your policy, select Android
Click on Device compliance / Policies and Create Policy
Platform: Android Device Administrator
Click Create at the bottom
Conditional Access Policy
Now that we have a Device Compliance Policy, we must create a Conditional Access Policy to decide what to do with our non-compliance devices.
If you’re not familiar with Conditional Access Policy, read the Microsoft documentation as you can lock the user out your company resources.
In the Intune Portal click Conditional Access
Click Policy / New Policy
Enter a Policy Name
Click User and Groups, select the group you want to target with your policy. We select our Test group
In Cloud Apps or actions, select All Cloud App. Full list of cloud app is available on the Microsoft documentation
In Conditions, select Device Platforms and select iOS (and Android – if applicable)
Still in Conditions, select Client App and select Browser and Mobile Apps and desktop clients – More information
In Access Controls, select Grant Access and Require Device to be marked as compliant. This is where we are saying to grant access only to compliant device (based on if there’s TikTok on the device)
At the bottom, enable your policy and click Save
Block TikTok Microsoft Intune – End UserResults
We will now test our configuration. Wait a couple of minutes for the Policy to synchronise.
Go to Device Compliance/ Policies
Select the TikTok policy and select Device Status under Monitor
Ensure that your test devices are Compliant. My device is compliant because I don’t have the TikTok app installed.
In the Company Portal, I check my device compliance status. Since my phone is compliant, I can access comany ressource.
I’ll now add TikTok and see how it goes
My Company Portal is now reporting that I must update my setting and that I may not be able to access company resources.
Let’s press on Check Status
I got the notification to uninstall the App to meet company policy
I also received an email since I enable the notification in my device policy
If I try to access a cloud app, I’m not able to access it.
The only way to regain access it to remove the restricted app which is exactly what we want to do.
We hope this blog post helped achieve your security policy. Let us know what are you blocking
Popular App BundleID
Here are some of the most common asked app to be blocked in a corporate environment
Windows Update for Business is one of the new things Microsoft proposed along with Windows 10. It has come a long way since it’s release. Even if it isn’t perfect yet, or give all the flexibility that ConfigMgr (MEMCM) offer when managing monthly update or feature release, for many small/medium business, this brings a more simple approach to patching and maintaining Windows 10 up to date. In this post, we will detail how to configure Intune Windows Update for Business to patch Windows 10 devices managed by Intune
Pre-requisites
Windows 10 must be managed by Intune
If Windows 10 is being co-managed with ConfigMgr(MEMCM), make sure the slider for Software Update is set to Intune
Intune Windows Update Business – Update rings strategy
Depending on multiple factors, the key for Windows Update for Business to be successful is to define the various update rings for your enterprise.
Here, no magic answer or one size fit all scenarios.
To take in consideration to build your strategy :
Number of users total/per rings
Risk tolerance for the Feature update release
Windows 10 Pro vs Enterprise
Pro only allows 18months support following the release date of a build. Feature update strategy is likely to be more aggressive than if Windows 10 Enterprise is used with its 30months policy for autumn releases.
What we usually recommend :
Minimum of 3 Update rings
Test, with a few IT people only
Pilot, with more IT people and users for many department/roles
Production, with everyone else.
Depending on the total amount of user and support capacity, consider multiple Prod rings to avoid too many users at once installing Feature Update
The monthly quality update can follow the same 3 major Update rings
Test, within the first few days of release
Pilot, within a week or so of the release
Prod, within 2-3 weeks after release
Remember, it’s not possible to deny a monthly update. So better be careful and avoid faulty updates for most of the users
Servicing channel for most if not all should be Semi-Annual channel
Carefully review User experience settings in the update ring. Find the best fit for your users along with security needs.
Here’s an example of an aggressive update rings configuration.
Key points are Deferrals for both monthly and Feature updates.
Other settings are mostly about User Experience, so this needs to be reviewed case by case.
Set scopes tags if needed
Set the Assignments. Interesting point here is that you can target groups of users, which in the long run is a much easier way to target test and pilot users without care about the device anymore.
Review
Monitor Windows Update for Business
This is still done with the Update Compliance from Windows Analytics. Note that this is the only component that hasn’t retired yet.
There is also a new option Windows 10 feature Update that is currently in preview. This allow administrators to select the Feature update to target instead of leaving it only by default.
For more details about Windows Update for Business, see Microsoft docs
Microsoft has released a second SCCM version for 2020. SCCM 2006 has been released on August 11th, 2020! (SCCM has a new branding since 1910 – now called Microsoft Endpoint Configuration Manager (MEMCM). This post is a complete step-by-step SCCM 2006 upgrade guide, meaning that if you want to upgrade your existing SCCM/MEMCM installation to the latest SCCM/MEMCM updates, this post is for you.
You won’t be able to install SCCM 2006 if you are running SCCM 2012.
SCCM 2002 is the latest baseline version. This means that if you’re downloading the source from Volume Licensing, 2002 will be the starting version of your new SCCM site. Once a new server is built using 2002, you can upgrade to the latest 2006 version after.
To install SCCM 2006 as an update, you must have installed SCCM 1810 or later. If you check for updates in your console and it’s not showing up, continue reading, we’ll describe how to get it using the “Fast Ring” script.
Keeping your infrastructure up to date is essential and recommended. You will benefit from the new features and fixes, which some of them can apply to your environment. It’s easier than ever to upgrade since Microsoft has implemented the servicing model directly from the console.
SCCM 2006 Upgrade Guide – New Features and Fixes
SCCM 2006 includes an incredible amount of new features and enhancements in the site infrastructure, content management, client management, co-management, application management, operating system deployment, software updates, reporting, and configuration manager console. This release is packed with interesting features to try.
Here’s our list of favourite features. Microsoft brings together SCCM/MEMCM and Intune into a single console called Microsoft Endpoint Manager admin center. We’ll do blog posts on the most interesting feature in the coming weeks :
Endpoint analytics data collection enabled by default
VPN boundary type
Management insights to optimize for remote workers
Intranet clients can use a CMG software update point
CMPivot from the console and CMPivot standalone has been converged
Run CMPivot from an individual device or multiple devices without having to select or create a collection
CMPivot query results, you can select an individual device or multiple devices then launch a separate CMPivot instance scoped to your selection.
You can now configure the client setting Configuration Manager can force a device to restart to prevent devices from automatically restarting when a deployment requires it.
Task sequence media support for cloud-based content
With a task sequence that uses a boot image to deploy an OS, you can deploy it to a device that communicates via CMG
You can now specify the disk encryption mode on the Enable BitLocker and Pre-provision BitLocker task sequence steps
CMG support for endpoint protection policies
Support for SCCM Current Branch Versions
Ensure to apply this update before you fall into an unsupported SCCM version. Read about the support end date of the prior version of the following Technet article.
Windows and SQL Support
Before installing, make sure that you are running a supported Operating System and SQL version. Older SCCM version was giving a warning during the Prerequisite check but 2006 is giving an error that prevents the installation from continuing.
SCCM 2006 supports only Windows 2012+ and SQL 2012 SP3+.
Important Info
Version 1906 client requires SHA-2 code signing support.
Due to weaknesses in the SHA-1 algorithm and to align to industry standards, Microsoft now only signs Configuration Manager binaries using the more secure SHA-2 algorithm. The following Windows OS versions require an update for SHA-2 code signing support:
Windows 7 SP1
Windows Server 2008 R2 SP1
Windows Server 2008 SP2
Before you Begin – SCCM 2006 Upgrade Guide
Downloading and installing this update is done entirely from the console. There’s no download link, the update will appear on your console once the Service Connection Point is synchronized.
If you’re running a multi-tier hierarchy, start at the top-level site in the hierarchy. After the CAS upgrade, you can begin the upgrade of each child site. Complete the upgrade of each site before you begin to upgrade the next site. Until all sites in your hierarchy are upgraded, your hierarchy operates in a mixed version mode.
Before applying this update, we strongly recommend that you go through the upgrade checklist provided on Technet. Most importantly, initiate a site backup before you upgrade.
In this post, we will update a stand-alone primary site server, consoles, and clients. Before installing, check if your site is ready for the update:
Open the SCCM console
Go to Administration \ Updates and Servicing
In the State column, ensure that the update Configuration Manager 2006 is Available
If it’s not available, right-click Updates and Servicing and select Check for Updates
Warning
The SCCM 2006 update is not yet available for everyone. If you need it right away you can run the Fast-Ring script and the update will show up.
If the update is not downloading, click on the button Download on the upper node. The update state will change to Downloading
You can follow the download in Dmpdownloader.log or by going to Monitoring / Updates and Servicing Status, right-click your Update Name and select Show Status
The process will first download .CAB file and will extract the file in the EasyPayload folder in your SCCM installation directory.
It can take up to 15 minutes to extract all files.
SCCM 2006 Upgrade Guide
Step 1 | SCCM 2006 Prerequisite Check
Before launching the update, we recommend launching the prerequisite check first. To see the prerequisite checklist, see the Microsoft Documentation
Open the SCCM console
Go to Administration \ Updates and Servicing
Right-click the Configuration Manager 2006 update and select Run prerequisite check
Nothing will happen, the prerequisite check runs in the background and all menu are unavailable during the check
One way to see progress is by viewing C:\ConfigMgrPrereq.log
You can also monitor prerequisite check by going to Monitoring / Update and Servicing Status, right-click your Update Name and select Show Status
If you have any warnings, follow the recommendation to fix the issue in the bottom pane
When completed the State column will show Prerequisite check passed
Right-click the Configuration Manager 2006 update and select Install Update Pack
Step 2 | Launching the SCCM 2006 Update
We are now ready to launch the SCCM 2006 update. At this point, plan about 45 minutes to install the update.
On the General tab, click Next
On the Features tab, checkboxes on the features you want to enable during the update
Don’t worry, if you don’t select one of the features now and want to enable it later, you’ll be able to so by using the console Administration \ Updates and Servicing \ Features
In the Client Update Options, select the desired option for your client update
On the License Terms tab, accept the license terms and click Next
On the Summary tab, review your choices, click Next and close the wizard on the Completion tab
The whole process took a minute but the installation begins on the back end.
During installation, the State column changes to Installing
We suggest you monitor the progress, by navigating to Monitoring / Updates and Servicing Status, right-click your Update Name and select Show Status
Unfortunately, the status is not updated in real-time. Use the Refresh button to update the view.
Open the SCCM update log SCCMInstallationDirectory\Logs\CMUpdate.log with CMTrace
Important Info
We’ve done numerous SCCM upgrades. Some installation start a couple of minutes after you complete the wizard but we’ve seen some installation starts after a 10 minutes delay. Do not reboot or restart any services during this period or your update can be stuck in “Prerequisite check passed” status. There’s actually no officially documented methods by Microsoft to fix that. Patience is the key!
When completed, you’ll notice the message There are no pending update package to be processed in the log file
Monitoring / Updates and Servicing Status, right-click your Update Name and select Show Status, the last step will be Installation Succeeded
Refresh the Updates and Servicing node in Administration, the State column will be Installed
Updating the Outdated Consoles
As a previous update, the console has an auto-update feature. At the console opening, if you are not running the latest version, you will receive a warning and the update will start automatically.
Since all updates operations were initiated from the console, we didn’t close it during the process. We received a warning message when clicking certain objects. You will have the same message when opening a new console
Click OK, console restart and update will start automatically
Wait for the process to complete. You can follow the progress in C:\ConfigMgrAdminUISetup.log and C:\ConfigMgrAdminUISetupVerbose.log. Once completed, the console will open and you’ll be running the latest version
Verification
Consoles
After setup is completed, verify the build number of the console. If the console upgrade was successful, the build number will be 8968and the version is now Version 2006. Notice the new Endpoint Configuration Manager branding!
SCCM Servers
Go to Administration \ Site Configuration \ Sites
Right-click your site and select Properties
Verify the Version and Build number
SCCM 2006 Clients
The client version will be updated to 5.00.8968.100x (after updating, see the section below)
SCCM 2006 Client Package distribution
You’ll see that the 2 client packages are updated:
Navigate to Software Library \ Application Management \ Packages
Check if the update is successful, otherwise, select both packages and initiate a Distribute Content to your distribution points
If you disabled database maintenance tasks at a site before installing the update, reconfigure those tasks. Use the same settings that were in place before the update.
SCCM 2006 Upgrade Guide – Monitor SCCM Client Version Number
SCCM Reports Client Version
You can see our SCCM Client version reports to give detailed information about every client version in your environment. It’s the easiest way to track your client updates.
Collections
In conclusion, you can create a collection that targets clients without the latest client version because is very useful when it comes to monitoring a non-compliant client.
Here’s the query to achieve this: (You can also refer to our Set of Operational Collection Powershell Script which contains this collection)
select SMS_R_SYSTEM.ResourceID,SMS_R_SYSTEM.ResourceType,SMS_R_SYSTEM.Name,SMS_R_SYSTEM.SMSUniqueIdentifier,SMS_R_SYSTEM.ResourceDomainORWorkgroup,SMS_R_SYSTEM.Client from SMS_R_System where SMS_R_System.ClientVersion != '5.00.9012.1007'
To enroll and manage iOS/MAC devices into Endpoint Manager, you need to create an Apple MDM Push Certificate. These certificates expire 365 days after you create them and must be renewed manually in the Endpoint Manager portal.
You will receive a notification email 30 days before the Apple MDM Push Certificate expires. It’s strongly recommended to renew the certificate before the expiration method.
If you don’t renew the certificate in time, you will need to re-enroll all Apple devices. In a lab environment, this can be done easily, but in a production environment with a hundred or thousand devices, this could mean a nightmare.
This post will describe how to Renew Apple MDM Push Certificate in Endpoint Manager
Verification
Besides the expiration email, you can see that your certificate is expired or the expiration date in the Endpoint Manager Portal.
Click Devices / iOS/iPadOS Enrollment and select Apple MDM Push Certificate
Antoher sign that your Apple MDM Push Certificate is expired would mean that users can’t access company ressource because the default company policy would block them.
If you tries to enroll the device, the company portal will send an error :
Couldn’t add your device. Contact your IT Admin for assistance with this issue. APNSCertificateNotValid
Renew Apple MDM Push Certificate in Endpoint Manager
Hopefully, you found out before your certificate expires…right ??… For this post, our certificate is expired for a while. The procedure to Renew Apple MDM Push Certificate in Endpoint Manager is still the same.
Click Devices / Ios/iPadOS Enrollment and select Apple MDM Push Certificate
In the Configure MDM Push Certificate pane
Check the agreement in #1
In the second step (#2), click on Download your CSR. A file will download in your browser. Keep this file for the next step
On the third step (#3), click on Create your MDM Push Certificate
You’ll be redirected on the Apple Push Certificate Portal
Login using the Apple ID used to create the certificate in the first place
In the Certificate Portal, select your Mobile Device Management Certificate and click Renew
In the Renew Push Certificate Portal, click the Choose file button and provide the Intune.CSR file that you’ve downloaded in the previous step
Click Upload
On the next page, click Download. The MDM_ Microsoft Corporation_Certificate.pem file will download. Keep this file for the next steps.
Back in the Endpoint Manager Portal
Complete step 4 by entering your Apple ID
Complete step 5 by entering the MDM_ Microsoft Corporation_Certificate.pem that you just downloaded
Click Upload at the bottom
Validation
Once completed, refresh the page and look at the top of the pane. You certificate should show ACTIVE and the Days until expiration will show 365
You’ve successfully renewed Apple MDM Push Certificate in Endpoint Manager. You can now re-enroll your device if the certificate was expired. You don’t have anything else to do on your Apple device if the certificate was still valid before the renewal process.
Beginning with SCCM/MEMCM 2002, it’s possible to Integrate Power BI Report Server to an existing Reporting Point or to a site that doesn’t have a reporting point installed. Doing so will give you the ability to manage your Power Bi Dashboard the same way you manage your SSRS report. All done directly from the console makes it easier to deploy and edit your existing dashboard and to create a new one. This post will describe the complete SCCM PowerBi Report Server Integration process. More specifically, how to Integrate SCCM/MEMCM Reporting point with Power BI Report Server on an SCCM 2002 site.
In our example, we’ll do it on a site that a reporting point is already installed but we’ll also explain the process for a site that doesn’t have a reporting point installed.
SCCM PowerBi Report Server Integration Prerequisites
Before you begin, you need to know that using a Power Bi Report Server is not free. You’ll need to have a Power BI Report Server license.
From here you have 2 possible paths: If you have a reporting point, follow the first steps, if you don’t have a reporting point, skip the first part and jump to the next section.
Reporting Point Already installed and running
The first step is to back up the reporting service encryption key. This is really important as if you skip this, you’ll lose access to your existing reports.
On the SCCM Reporting Server
Open Reporting Server Configuration Manager
Connect to your Reporting Instance
Click Encryption Keys and then select Back Up
Specify where to save the key, a file name(.snk) and type a strong password
Select OK
Ensure that there’s no error at the bottom and that the file has been created in the specified location
We will now remove the reporting services point role from the SCCM site
Open the SCCM Console
Go to Administration / Site Configuration / Servers and Site System Roles
Select the server on which you have a reporting service point, select it and at the bottom, right-click Reporting Services Point and select Remove Role
At the warning, select Yes
We will now uninstall SQL Server Reporting Services using the Program and Feature on the server
Select your SQL Server version (ex:SQL Server 2016 (64-bit)) and select Uninstall at the top
At the SQL 2016 window, select Remove
Select your instance and click Next
Only select Reporting Service – Native. Be careful here not to select Database Engine as you could destroy your SCCM installation
At the bottom, click Remove
Power Bi Server Installation
We will now install Power BI Report Server
Click on the installation file downloaded in the Prerequisite Section
Select Install Power BI Report Server
Choose an edition to install and then select Next
Read and agree to the license terms and conditions then select Next
You need a Database Engine available to store the report server database. Select Next to install the report server only.
Specify the install location for the report server. Select Install
After a successful setup, select Configure Report Server to launch the Reporting Services Configuration Manager
When we uninstalled the SQL Reporting service in the steps before, the database was left intact. Now we just need to restore the backup keys.
Go to Database and select Change Database
Select Choose an existing report server database and select your Server database that you were already using
Select your server and credential
Ensure to select your ReportServer database
In Reporting Server Configuration Manager, select Encryption Key and then select Restore. Specify the file path that you saved in the prior steps and enter the backup password
Ensure at the bottom that everything is setup correctly
Return to the SCCM Console and add back the Reporting Services point role in Configuration Manager
We already documented the process of adding a Reporting Point in our SCCM Installation guide
No reporting points installed
Only use this process if you don’t already have a reporting services point on your SCCM site. Do all steps of this process on the same server:
With SCCM 2002 that was just released, a small but extremely useful feature is now available in console. It is now possible to view what boundary group a device is connected to!
This offers a new opportunity with collections based on Boundary groups, which could mean physical sites or any other meaningful needs in your environment.
I’ve created a PowerShell script that automatically creates collections based on all the available boundary groups.
Important Info
A few important notes on the information available here first :
If a device is in more than one boundary group, the value is a comma-separated list of boundary group names.
The data updates when the client makes a location request to the site, or at most every 24 hours.
If a client is roaming and not a member of a boundary group, the value is blank.
Information is only available on Primary sites. It is not visible on the CAS.
Requirements
SCCM must be at least version 2002. See our Step-by-step guide upgrade guide here
Be sure to rate the submission if you are using it.
Example of the result of the script
Tip
Add region, country, or else as a prefix in your boundary group names for easier sort.
Collection query for boundary groups
Thanks to fellow SystemCenterDudes, Eswar Koneti, for his post about that exact query This isn’t the typical query for collections
WQL Query
select SMS_R_SYSTEM.ResourceID,SMS_R_SYSTEM.ResourceType,SMS_R_SYSTEM.Name,SMS_R_SYSTEM.SMSUniqueIdentifier,SMS_R_SYSTEM.ResourceDomainORWorkgroup,SMS_R_SYSTEM.Client from SMS_R_System where SMS_R_System.ResourceId in (select resourceid from SMS_CollectionMemberClientBaselineStatus where SMS_CollectionMemberClientBaselineStatus.boundarygroups like ‘%”<BoundaryGroupName>“%’) and SMS_R_System.Name not in (‘Unknown’) and SMS_R_System.Client = ‘1’
Note that I use a like in the query. I’m doing so in the case of clients in multiple boundary groups. This will help in fixing potential errors in a boundary or boundary group.
Scripts details
A few parameters can be chosen in the script to fit your environment.
$CollectionPrefix let you decide what, if any, characters should be at the beginning of the collection
by default, it is set to BG –
$LimitingCollection
There is some default limiting collection options that are available, based on my previous script to create Master Collections
Simply uncomment the desired limiting collection
$Schedule
Refresh of the collection is set to once a day by default
A new folder is created at the root of all device collections, called Boundary Groups based collection
While the requirements of running SCCM/MEMCM in full SSL may be less required theses days with the Cloud Management Gateway being so effective with remote computers management, running the WSUS – Software Update point in SSL is likely to show up as a requirement whenever doing a security audit of your environment.
In this post, we will detail the required steps, from the certificate template creation to the client validation on enabling SSL for WSUS and the SCCM Software Update Point.
Using Internet-based client management would require such configuration to support Patch management while computer outside of the organization network.
This post focus only on configuring WSUS / Software Update point for SSL communication.
Requirements
Any SCCM version
Communication on port 8531 must be open on your Firewall
Warning
This post assume the the root CA is trusted by clients. This will be required since the certificate used should come from the same trusted source.
Certificate template Creation
The first step to enable SSL communication is to create a server certificate for your server.
On the server that is running the Certification Authority, open the Certification Authority console (certsrv.mmc), right-click Certificate Templates and select Manage
The Certificate Templates management console opens
Right-click the Web Server template and then select Duplicate Template
In the Duplicate Template dialog box, ensure that Windows 2003 Server, Enterprise Edition is selected in Certification Authority
In the General tab, enter a template name, like ConfigMgr Web Server
Change the validity period if needed. As a best-practice, the longer the validity period, the less secure is your certificate
In the Request Handling tab, select Allow private key to be exported
While not mandatory, this could become useful depending on the environment
In the Security tab, remove the Enroll permission from the Enterprise Admins security group
Choose Add, enter a group that has the WSUS/SUP server in. It can be an existing SCCM Server group. Then choose OK
Select the Enroll and Read permission for this group
Choose OK, close Certificate Templates Console
Back in the Certification Authority (certsrv.mmc) console, right-click Certificate Templates, select New / Certificate Template to Issue
Request certificate
The following must be done in the WSUS/SUP server. No need for standalone server, if role is installed on the primary server, it is fine.
Open the MMC console for a certificate of the computer
Under Personal/Certificates, right-click and select All tasks /Request new certificate
Click next
Select the web server certificate template created earlier
Under Alternative name, select DNS and enter the FQDN of the WSUS/SUP server, then click Add
Under General, it may be a good idea to add a Friendly name and description to ease management of certificates on the server
Hit ok and complete the wizard to create the certificate.
Configure WSUS administration website to use SSL
Open IIS, select the WSUS administration site and click on Bindings
Select HTTPS and click on Edit
From the select, chose the ConfigMgr WSUS SSL certificate enrolled earlier on the server
The IP address can be left to default All Unassigned
Expand the WSUS Administration site and select API Remoting30, then select SSL settings
Check the box Require SSL and hit Apply on the right side of the console
Repeat this step for the following components
ClientWebService
DssAuthWebService
ServerSyncWebService
SimpleAuthWebService
The last step, open a command prompt as admin, browse to the C:\Program Files\Update Services\Tools, and run the following command
WSUSUTIL configuressl <fqdn or the WSUS server>
Configure SCCM Software update point in SSL
Open the SCCM console, and browse to Administration/SiteConfigurations /Server and Site System roles, then select the Software Update point
Check the box Require SSL communication to the WSUS server
Once completed, it is a good idea to restart the Software Update point service to ensure communications are good under SSL.
To do so, browse to Monitoring/System Status/Component Status and start the Configuration Manager Service manager
Find SMS_WSUS_Configuration_Manager and restart it
Server validation
Forcing a Synchronize is a good idea to confirm hierarchy is still working correctly
On the Software Library node, select All Software Updates and click on Synchronize Software Update in the ribbon
Client Validation
On a client, run a Machine policy retrieval, followed by a Software Update scan cycle to validate client->server communication is working correctly.
Once the Update scan is initiated, progress can be seen in the WUAHandler.log on that client. We can notice the change in the URL pointing the HTTPS://<fqdn of the WSUS/SUP server>:8531
Downstream Software Update point
If you are having multiple WSUS/Software Update point, here are some important notes
When enabling SSL on WSUS, it should always be the parent WSUS/SUP that is configured first in SSL, before moving to downstream servers
Downstream servers require the exact same steps as mentioned above in order to be configured to use SSL.
Doing it only on the primary WSUS/SUP will not make clients communicate over SSL to downstream servers.
When the primary Software Update point is forced to use SSL, downstream WSUS will automatically check the box Use SSL when synchronizing update information to sync using port 8531 to the parent WSUS.
For more details on enabling SSL for WSUS, see Microsoft Docs.
The amount of data that transfers daily on a corporate network is quite important. Once a month, Windows Update has quite an impact on that amount. SCCM along Delivery Optimization can help better manage that crazy amount of GB or even TB of content required to patch all computers.
Using Delivery Optimization along ConfigMgr can be useful for the following reasons :
Avoid hosting GBs of updates on-prem across many different distribution points/host/data center to support all clients download. The content also becomes obsolete about 1 month after the download and distribution date.
Avoid using bandwidth between sites to sync GBs of updates
Leverage local Internet access from clients to download content locally
Self-clean up of obsolete content after a defined period.
Still use ConfigMgr to approve updates and does not change your patch cycle strategy
The Allow peer downloads in this boundary groupmust be checked for Delivery optimization to work.
If you have large boundary groups, enabling During peer downloads, only use peers within the same subnet may be a good fit.
For more details about peer download configuration for boundary groups, see Microsoft docs.
Client settings
There is 2 clients settings in order for Delivery Optimization to be configured.
Under Delivery Optimization, enable Use Configuration Manager boundary Groups for Delivery optimization for group ID
This option will define Delivery Optimization in Group Mode, which was pretty hard to achieve without boundary groups.
Under Software Update, enable Allow Clients to download delta content when available.
This does NOT require to enable Express Update on your Software Update Point.
Those client settings will create the following local policies on Windows 10 devices.
Delivery Optimization’s GPO
Why are GPO required on top of the ConfigMgr client configuration? Because some default values are a bit low to see a real benefit from using Delivery Optimization
The following GPO should be review and changed to recommended value.
Under Computer Configuration/Administrative Templates/Windows Component/Delivery Optimization, enable Max Cache Age
By default, it is set to 3 days, which is a bit fast to allow computers to share over your patching cycle
1814400 seconds is 30 days wish is reasonable to expire content prior to next cycle.
By default, it is set to 100mb. This isn’t critical for Windows Updates but could become really useful to allow computers to share content for smaller content, like Windows store apps that about for about 100MB per client per month.
Under Computer Configuration/Administrative Templates/Windows Component/Delivery Optimization, enable Delay Foreground download from HTTP
By default, it is set to 0 seconds, so it doesn’t allow computers to reach for content on Peers. Again not mandatory in terms of monthly patching from ConfigMgr, but useful for Microsoft store apps updates.
Under Computer Configuration/Administrative Templates/Windows Component/Delivery Optimization, enable Delay background download from HTTP By default, it is set to 0 seconds, so it doesn’t allow computers to reach for content on Peers. We decided to wait for 60 seconds prior to reach online for content. This is mostly for clients that are past due the schedule and haven’t downloaded to content ahead. It could generate large delay in user experience.
For more details about Delivery Optimization configuration, see Microsoft Docs
Software Update deployment
In order to make to most out of Delivery Optimization, clients must get updates from Microsoft Update, otherwise, other services like BranchCache will take over if downloaded from an internal source.
To allow clients to get updates from Windows Update, check the box If software updates are not available on Distribution point, download content from Microsoft Update. This is done on the deployment of the Software Update group.
That checkbox alone isn’t enough. If updates are available on a local Distribution Point, it will ignore any DO configuration and download locally. The Distribution point for the client must not host Windows update files.
This means remove the Software Update Package from the distribution point
Eventually, even the Automatic deployment rule can be modified to not even attempt to download updates if 100% of your clients gets content from Microsoft Update
Delivery optimization Results
The following month of patching will reflect the gain of using Delivery Optmization. To review it, browse to Monitoring/Distribution Status/Client Data source
Locally on clients, there’s a few Delivery optimization cmdlet to review usage.
Get-DeliveryOptimizationPerfSnapThisMonth
Get-DeliveryOptimizationPerfSnap
A side benefit of using Delivery Optimization
As explained earlier, leveraging Delivery Optimization for ConfigMgr content can also be useful for Apps updates from the Windows Store. Windows 10 computers download about 100mb worth of updates for all apps per month. Multiply this by the number of devices you have, and a TB of content will quickly arrive.
The below screen is taken from Update compliance that tracks this information, while ConfigMgr only reports content from Windows Updates.
Bonus Resources
Are you using PowerBI? We did an insane report regarding client content usage. You will have a better idea of which client is using which type of content.
Bottom notes
Be patient to see results
There’s also Microsoft Connected Cache, AKA Delivery Optimization In-Network Cache(DOINC), available if you wish to configure your distribution point as DO caches.
For more on ConfigMgr Delivery Optimization, see Microsoft docs.
We’ve been in the consulting world since SMS 2003 and we’ve seen so much stuff over the years! From the famous task sequence deployed to All system to the “fuck it let’s set our collections to be all incremental to make SCCM faster!”, we’ve seen it all… or have we? This blog post is an informative post on some of the SCCM Dos and Donts that you need to follow when using SCCM/MEMCM.
This post is intended to be informative, use it to refresh your skill or simply if you’re starting your SCCM journey and you’re looking to learn something new about.
SCCM/MEMCM – Donts
Ok, let’s start with the Don’ts. What you should avoid doing in the latest SCCM version?
Install a Central Administration Site
Don’t use a CAS. You’ll see this advice everywhere… and it’s true. Don’t use it. Just don’t.
When the Central Administration Site was introduced back in SCCM 2012 SP1 there was no concept of a preferred site system. If you had to manage thousands of clients in a remote site/region and a secondary site was not an option, the installation of numerous Primary Sites was needed (so was the CAS).
But now that new client management options were introduced in later SCCM version, this is not needed anymore.
A Central Administration Site may be needed in specific scenarios. If you need to manage more than 175 000 clients or need more than 250 distribution points and you’re still unsure or don’t know what you’re doing, please ask for external help!
Install a Seconday Site in remote locations
There was a day where putting a Secondary site to “big” remote site was the only solution available. Basically, you would install a secondary site if you had :
More than 500 clients in a remote location
Need a local Management Point
Need a local Software Update Point
With the latest SCCM version, clients can use boundaries to find site systems. Our recommendation would be to install Management Point, Distribution Points and Software Update Point remotely and use boundaries to communicates to these site systems.
Follow Microsoft recommendation for installing a secondary site but as for us, we didn’t install a secondary site for months. I’m not even sure it’s still required to this day to support the addition of secondary sites.
Install SQL on a separate server
In most scenarios, co-locate your SQL installation on your SCCM Primary Server. This is always debatable and often an unpopular topic among Database Administrators. DBA likes to have control and centralized databases as much as possible, however, co-location ensures better performance of your SCCM server.
From a licensing point of view, it’s not an issue since all of the System Center products include SQL Server technology
Incremental Collection everywhere
Collection refreshes are heavy processes on your server resource. It can bring your server running really slow if you configure collection incorrectly. The biggest mistake is enabling incremental refresh on all collections. We also often see incremental AND full collection updates enabled on the same collections.
SCCM Dos and Donts – Deploy to large collections without double verification
This one is fairly simple but so often forgotten. How many times we’ve seen an admin panicking because its deployment was spreading to All System. Unfortunately, there’s no Big red button to stop a wrong deployment out of the box. When deploying, always make sure to :
Double-check the collection and its members. Is the scoping right? Is the collection up-to-date?
Ensure that the correct setting for the reboot is set. You don’t want to reboot a workstation in the middle of the day after a sneaky deployment
Ensure that your available/required option and schedule are set correctly
When you check all of the above, check again and then, hit Apply
SCCM/MEMCM – DO
Enable Co-management
Enabling Co-management lets you to manage Windows 10 devices by using both SCCM and Microsoft Intune. It lets you cloud-attach your existing investment in Configuration Manager by adding new functionality. By using co-management, you have the flexibility to use the technology solution that works best for your organization.
So why enable CoManagement ? Why not is more the question. It’s so easy to enable, that you should at least try it to start your modern management strategy. (See next tip)
Get familiar with Intune
Microsoft is putting efforts to fill in the management possibility between SCCM and Intune. Will SCCM die? Not in the near future. But who knows what the future hold in a world where technology changes so fast.
If you use mobile devices (Phone, Tablet), Intune is a no brainer.
For Windows 10 devices, Intune is an additional management tool that you should at least start to use. It gives you new possibilities to manage your devices even if they are outside your organization network. (Device Profile, Conditional Access, Compliance Policies).
The cloud management gateway provides a simple way to manage SCCM clients on the internet. The CMG is a cloud service in Microsoft Azure, you can manage traditional clients that roam on the internet without an additional on-premises infrastructure. You don’t need to expose your on-premises infrastructure to the internet.
With the COVID outbreak, the CMG became a must to manage a roaming device during the time that everyone was working from home. Without a cloud management gateway or an Internet Based Client Management solution, you would simply won’t be able to manage them until they came back to the office.
Become a CMPivot Expert
SCCM has always been good with reporting and inventory of it’s managed devices but SCCM data is up-to-date at the last time the inventory has been run. SCCM CMPivot allows SCCM administrators to initiate a live query on selected computers on a specific topic. The result of that query can then be used to mitigate and fix potential issues.
How many time were you asked “what is the current state as of NOW?” well, you’ll finally be able to answer appropriately with SCCM CMPivot.
You may already use many SSRS reports to monitor and visualize your SCCM data. Microsoft has released PowerBI a couple of years ago and has its advantage over SSRS:
Support for Windows 7 ended on January 14, 2020. If you are still using Windows 7, your PC may become more vulnerable to security risks. Microsoft published the Windows 10 2004 feature update (aka Windows 10 May 2020 Update) on VLSC. If you haven’t planned your Windows 7 migration to Windows 10, this post will help prepare your SCCM Server to deploy it.
You may also need to deploy Windows 2004 to your Windows 10 computer to stay supported or to benefits from the new features. Before deploying a new Windows 10 feature upgrade, you need to have a good plan. Test it in a lab environment, deploy it to a limited group and test all your business applications before broad deployment. Do not treat a feature upgrade as normal monthly software updates. Treat it as a new operating system as if you were upgrading Windows 7 to Windows 10.
This blog post will cover all the task needed to deploy the new SCCM Windows 10 2004 Upgrade :
Check if you have an SCCM Supported version
Upgrade your Windows ADK
Import the OS in SCCM to use with your deployment Task Sequence
Create a Windows 10 Upgrade Task Sequence for Windows 10 (and Win 7 or 8.1 computers)
Update your Automatic Deployment Rules and Software Update, groups
Import your ADMX
Check Prerequisite SCCM Windows 10 2004 Upgrade
For Windows 10 2004 May 2020 Update, you need at least SCCM 2002 in order to support it as a client. See the following support matrix if you’re running an outdated SCCM version and make sure to update your site.
Windows ADK
Before capturing and deploying a Windows 10 2004 image, make sure that you’re running a supported version of the Windows ADK. Windows recommends using the Windows ADK that matches the version of Windows you’re deploying. If you’re already running an ADK version on your SCCM server, see our post on how to install a new version.
Upgrade Method – Task Sequence or Servicing Plan?
You can’t use servicing plans to upgrade Windows 7 or Windows 8 computers. So you must use an upgrade task sequence.
In order to upgrade an existing Windows 10 to Windows 2004, you have 2 choices: You can use an upgrade Task Sequence or you can use Servicing Plans.
There a strong debate over which is the best method. We prefer to use Upgrade Task Sequence for the simple reason that it’s more customizable. You can run pre-upgrade and post-upgrade tasks which will be mandatory if you have any sort of customization to your Windows 10 deployments.
For example, Windows 10 is resetting pretty much anything related to regional settings, keyboard, start menu and taskbar customization. Things are getting better from one version to another but if you’re upgrading from an older build, let’s say 1511, expect some post-configuration tasks… and the only way to do that is using a task sequence.
Servicing Plan has the simplicity, you set your option and forget, as for Automatic Deployment Rules does for Software Updates. We yet did not have any client that doesn’t want any control over Windows 10 upgrade in their organization. We totally understand the point of Servicing Plan and they’ll be useful in a couple of releases when Windows 10 upgrades will be an easy task… but for now, it’s not, unfortunately.
Import SCCM Windows 10 2004 Operating System
We will now import the Windows 10 2004 WIM file for Operating System Deployment. If you don’t have the Windows 10 ISO, you can download it from Microsoft Volume Licensing Site.
We will be importing the default Install.wim from the Windows 10 media for a “vanilla” Windows 10 deployment. You could also import a WIM file that you’ve created through a build and capture process. This WIM wile will be used for new computers, to upgrade an existing Windows 10, you need to import an Operating System Upgrade Packages. We will cover this in the next section.
Open the SCCM Console
Go to Software Library / Operating Systems / Operating System Images
Right-click Operating System Images and select AddOperating System Image
On the Data Source tab, browse to your WIM file. The path must be in UNC format
You can now select to import only a specific index from the WIM file. We selected the Windows 10 Enterprise index
Select your Architecture and Language at the bottom and click Next
In the General tab, enter the Name, Version and Comment, click Next
On the Summary tab, review your information and click Next
Complete the wizard and close this window
Distribute your SCCM Windows 10 2004 Operating System Image
We now need to send the Operating System Image (WIM file) to our distribution points.
Right-click your Operating System Image, select Distribute Content and complete the Distribute Content wizard
Add Operating System Upgrade Packages
We will now import the complete Windows 10 media in Operating System Upgrade Packages. This package will be used to upgrade an existing Windows 10 or a Windows 7 (or 8.1) device to Windows 10 using an Upgrade Task Sequence.
Open the SCCM Console
Go to Software Library / Operating Systems / Operating System Upgrade Packages
Right-click Operating System Upgrade Packages and select AddOperating System Upgrade Packages
In the Data Source tab, browse to the path of your full Windows 10 media. The path must point to an extracted source of an ISO file. You need to point at the top folder where Setup.exe reside
You can now select to import only a specific index from the WIM file. We selected the Windows 10 Enterprise index
Select your Architecture and Language at the bottom and click Next
In the General tab, enter the Name, Version, and Comment, click Next
On the Summary tab, review your information and click Next and complete the wizard
Distribute your Operating System Upgrade Packages
We now need to send the Operating System Upgrade Package to your distribution points.
Right-click your Operating System Upgrade Package, select Distribute Content and complete the Distribute Content wizard
Create SCCM Task Sequence for Windows 10 2004
Let’s create an SCCM task sequence upgrade for a computer running a Windows 10 device. Once again, this Task Sequence could be used for Windows 7 or 8.1.
Open the SCCM Console
Go to Software Library \ Operating Systems \ Task Sequences
Right-click Task Sequences and select Upgrade an operating system from upgrade package
In the Task Sequence Information tab, enter a Task Sequence Name and Description
On the Upgrade the Windows Operating System tab, select your upgrade package by using the Browse button
Select your Edition Index depending on the edition you want to deploy. If you select just 1 index as per our indication in previous steps, you’ll see just 1 index to select from.
On the Include Updates tab, select the desired Software Update task
All Software Updates will install the updates regardless of whether there is a deadline set on the deployment (on your OSD collection)
Mandatory Software Updates will only install updates from deployments that have a scheduled deadline (on your OSD collection)
Do not install any software updates will not install any software update during the Task Sequence
On the Install Applications tab, select any application you want to add to your upgrade process
On the Summary tab, review your choices and click Next and click Close
Edit the SCCM Windows 10 2004 Task Sequence Upgrade
Now that we have created the upgrade task sequence, let’s see what it looks like under the hood.
Open the SCCM Console
Go to Software Library \ Operating Systems \ Task Sequences
Right-click your upgrade task sequences and select Edit
As you can see, it’s fairly simple. SCCM will take care of everything in a couple of steps :
The Upgrade Operating System step contains the important step of applying Windows 10
Ensure to choose the right Edition
Deploy the SCCM Windows 10 2004 Upgrade Task Sequence
We are now ready to deploy our task sequence to the computer we want to upgrade. In our case, we are targeting a Windows 7 computer.
Go to Software Library \ Operating Systems \ Task Sequences
Right-click Task Sequences and select Deploy
On the General pane, select your collection. This is the collection that will receive the Windows 10 upgrade. For testing purposes, we recommend putting only 1 computer to start
On the Deployment Settings tab, select the Purpose of the deployment
Available will prompt the user to install at the desired time
Required will force the deployment at the deadline (see Scheduling)
You cannot change the Make available to the following drop-down since upgrade packages are available to clients only
On the Scheduling tab, enter the desired available date and time. On the screenshot, we can’t create an Assignment schedule because we select Available in the previous screen
In the User Experience pane, select the desired options
In the Alerts tab, check Create a deployment alert when the threshold is higher than the following check-box if you want to create an alert on the failures
On the Distribution Point pane, select the desired Deployment options. We will leave the default options
Review the selected options and complete the wizard
Launch the Upgrade Process on a Windows 10 computer
Everything is now ready to deploy to our Windows 10 computers. For our example, we will be upgrading a Windows 10 1909 to Windows 10 2004. This task sequence can also be used on a Windows 7 or 8.1 devices to install Windows 10 2004.
Log on our Windows 10 computer and launch a Machine Policy Retrieval & Evaluation Cycle from Control Panel / Configuration Manager Icon
You’ll see the SCCM upgrade task sequence as available. We could have selected the Required option in our deployment schedule, to launch automatically without user interaction at a specific time
When ready, click on Install
On the Warning, click Install
The update is starting, the task sequence Installation Progress screen shows the different steps
The WIM is downloading on the computer and saved in C:\_SMSTaskSequence
You can follow task sequence progress in C:\Windows\CCM\Logs\SMSTSLog\SMSTS.log
After downloading, the system will reboot
The computer restart and is loading the files in preparation for the Windows 10 upgrade
WinPE is loading
The upgrade process starts. This step should take between 60-90 minutes depending on the device hardware
Windows 10 is getting ready, 2-3 more minutes and the upgrade will be completed
Once completed the SetupComplete.cmd script runs. This step is important to set the task sequence service to the correct state
Windows is now ready, all software and settings are preserved
Create Software Update Group
One important thing in any OSD project is to make sure that the deployment of every machine is up to date. Before deploying Windows 10 2004, make sure that your Software Update Point is configured to include Windows 10 patches.
Once Windows 10 is added to your Software Update Point, we will create a Software Update Group that will be deployed to our Windows 10 deployment collection. This way, all patches released after the Windows 10 media creation (or your Capture date) will be deployed during the deployment process.
To create a Windows 10 Software Update Group :
Open the SCCM Console
Go to Software Library / Software Updates / All Software Updates
On the right side, click Add Criteria, select Product, Expired and Superseded
Product : Windows 10
Expired : No
Superseded: No
Title contains 2004
Select only the latest Cumulative Updates that apply (x64 or x86) and select Create Software Update Group
Once created, go to Software Library / Software Updates / Software Update Groups
Right-click your Windows 10 SUG and deploy it to your OSD deployment collection
Import ADMX File
If you’re responsible for managing group policy in your organization. Ensure that you import the latest Windows 10 2004 ADMX file on your domain controller.
Bonus Resources
After your SCCM Windows 10 2004 Upgrade, need a report to track your Windows 10 devices? We developed a report to help you achieve that :